Difference between revisions of "SimpleBot-Assembly"
(→Check Parts In Kit) |
(→Overview) |
||
| Line 26: | Line 26: | ||
== Overview == | == Overview == | ||
| − | There are | + | There are four main steps to getting your SimpleBot up and running: |
| − | * Assembling the "SimpleBot Shield", which is supplied in kit form. | + | * 1: Assembling the "SimpleBot Shield", which is supplied in kit form. |
| − | * Assembling the full SimpleBot chasis. | + | * 2: Assembling the battery pack. |
| − | * Setting up the software and connecting to the SimpleBot. | + | * 3: Assembling the full SimpleBot chasis. |
| + | * 4: Setting up the software and connecting to the SimpleBot. | ||
== SimpleBot Shield Assembly == | == SimpleBot Shield Assembly == | ||
Revision as of 11:03, 8 January 2015
Contents
Tools
Your own tools are not required for the LCA assembly session, but if you are able to bring any of the following then that would be great.
If you're flying, please bear in mind that sharp items like cutters or multimeter probes will need to be put into checked baggage not carry-on.
- Wire cutters (and wire strippers if you have them)
- Multimeter
- Soldering iron
- Solder
- Small Phillips-head screwdriver
If you want to also do the optional surface mount assembly steps, there are some additional tools listed on that page
Check Parts In Kit
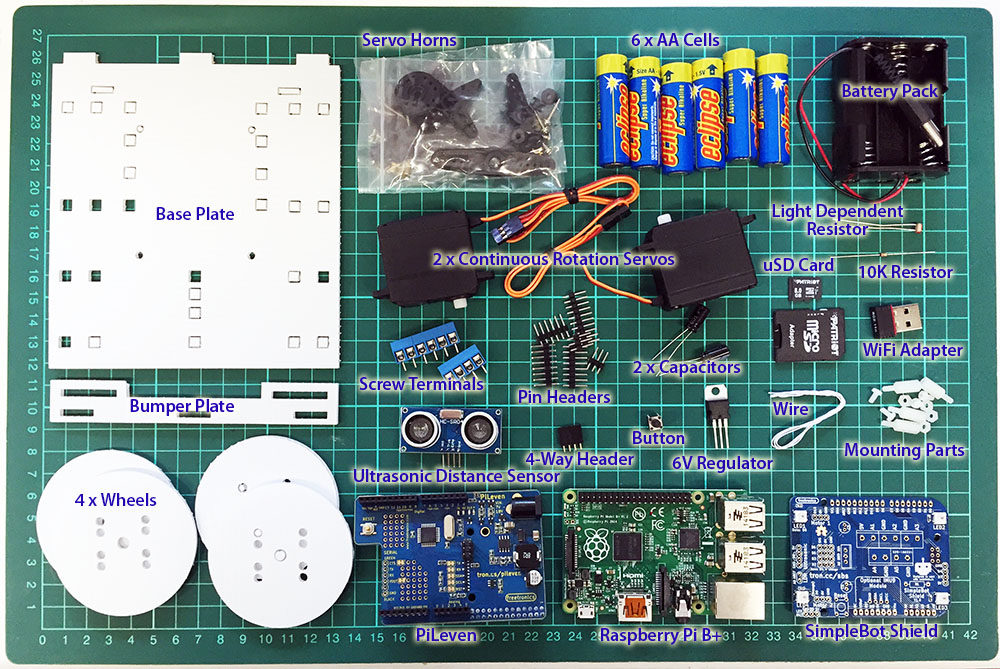
Your kit should contain the following items:
Your kit will also include cable ties, which are not shown in this picture.
Please check over the items in your kit, and if you think you are missing something then let us know.
Overview
There are four main steps to getting your SimpleBot up and running:
- 1: Assembling the "SimpleBot Shield", which is supplied in kit form.
- 2: Assembling the battery pack.
- 3: Assembling the full SimpleBot chasis.
- 4: Setting up the software and connecting to the SimpleBot.
SimpleBot Shield Assembly
Optional Surface Mount Assembly for SimpleBot Shield (this is an optional step for confident solderers who want to try some surface mount soldering).
